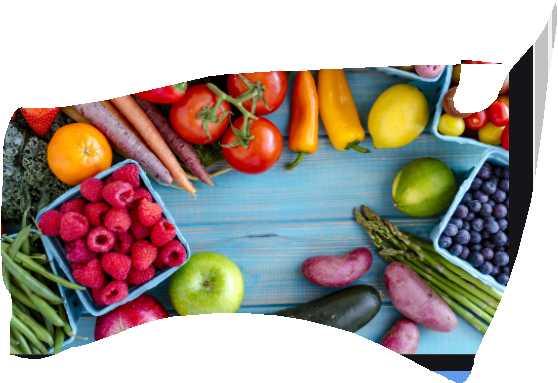
BEFORE YOU GET TOO EXCITED at the title of this section, we need to tell you something. You will be using more than one pot to prepare some of these dishes. Okay, most of these dishes. We know you were envisioning a two-minute clean-up after cooking from this section—just you, a sponge, and one pot (unlike the usual kitchen carnage that shows up after you prep, cook, and serve dinner). But the title of this section isn’t really meant to represent your cooking vessels; rather, the fact that you’ll be cooking a complete meal (protein, vegetables, and natural fats) all in one dish, with no need to find a side dish or dressing pairing. So we are making it easier on you here. Just maybe not easier on your dishwasher. If you feel like you’re in “Good Food jail” (chained to your cutting board, stove, and sink) during this Whole30, let’s talk about a few ways you can streamline the preparation, cooking, and clean-up process. The first tip is to batch-prep your food. Set aside a few hours on a Sunday or thirty minutes on a weeknight after work and make some things ahead of time. Prepare a marinade or spice mixture you know you’ll be using soon, make three or four dressings and sauces, and pre-chop your vegetables (they’re fine stored in a covered container in the fridge for a few days). The less you have to do when you’re rushing around to get dinner on the table, the cleaner your kitchen will be. Place a “garbage bowl” on the counter for remnants like onion tops, apple cores, or herb stems. Limiting trips to and from the garbage can saves time and spills onto your kitchen floor. Reuse kitchen tools as often as you can. If you’re just chopping vegetables, there is no need to use more than one cutting board—just wipe the remnants of the vegetables off, then move to your next ingredient. Same with knives and measuring cups—you may need a quick rinse in between, but you certainly don’t need a fresh tool for every ingredient. (Careful with raw meat, though—that should have its own cutting board, and any tools that come into contact with the meat should be washed thoroughly before using them again.) Combine ingredients whenever you can. If you add the onions, the peppers, and the mushrooms to the pan all at the same time, leave them all on the same cutting board or hold them all in the same mixing bowl—no need to dirty extras. Same for spice mixtures; if you’re combining all the spices in the pan anyway, just use one small dish to hold them all during your prep. If you need to coat vegetables in oil before roasting them, you can put them in a bowl, add the oil, and mix . . . or you can do what we do, which is lay the vegetables out on your lined baking sheet, drizzle the oil evenly over the veggies, and toss with your hands until they are well coated. One less greasy bowl to wash = winning. Finally, we know every cookbook will tell you to clean as you go, but you really should clean as you go. (Or at the very least, rinse.) If something is simmering for a few minutes, wash a bowl or two, wipe your counter down, or return your spices to the cabinet. If you can finish cooking your meal with a relatively clean kitchen, the clean-up post-dinner is a snap. Especially if you make your spouse, partner, or roommate do it. recipes chicken cacciatore chicken chowder chicken primavera stir-fry chicken classic chili roasted pork shoulder with butternut squash, kale, and tomatoes no-fuss salmon cakes pot roast shepherd’s pie thai coconut soup chicken cacciatore SERVES 2 PREP TIME: 15 minutes COOK TIME: 40 minutes TOTAL TIME: 55 minutes 4 tablespoons cooking fat 1 pound chicken legs (bone-in, skin-on) ½ pound chicken thighs (boneless) ½ teaspoon salt ½ teaspoon black pepper ½ onion, minced ½ red bell pepper, finely diced 1 cup mushrooms, sliced 2 cloves garlic, minced 1 tablespoon capers, drained 1 14.5-ounce can diced tomatoes 1 cup chicken broth or water 1 tablespoon fresh basil leaves, rough chopped While you could make this dish with boneless, skinless everything, you’d be missing out. The chicken skin holds the fat, and fat equals flavor. Plus, skin-on chicken retains the sauce better, and gives a warm, rustic look to the dish. While it’s not an official rule, we’d recommend purchasing pastured and/or organic chicken, especially when you are making dishes that include the chicken skin. IN a large skillet with high edges, heat 2 tablespoons of the cooking fat over medium-high heat, swirling to coat the bottom of the pan. Season the chicken with the salt and pepper and place in the pan. Sear the chicken until golden brown, about 3 minutes on each side. Remove the chicken from the pan and set aside. WITH the same pan still on medium-high heat, add the remaining 2 tablespoons of cooking fat, onions, and peppers and sauté for 2 to 3 minutes, until the onion becomes translucent. Add the mushrooms and continue to cook, stirring for 2 minutes. Add the garlic and stir until aromatic, about 1 minute. Add the capers and diced tomatoes. RETURN the chicken to the pan and cover everything with the chicken broth or water. Reduce the heat to medium and bring everything to a simmer. Turn the heat down to low and continue to simmer (not boil) until the chicken reaches an internal temperature of 160°F, about 30 minutes. GARNISH with the chopped basil and serve. MAKE IT A MEAL: This one-pot meal technically stands alone, but to add even more nutritional power, serve over Cauliflower Rice, a plate of fresh baby spinach leaves, or a thin layer of mashed potatoes. For more of an Italian feel, serve over zucchini noodles or Roasted Spaghetti Squash. ✪WITH A LITTLE PLANNING, you could buy a 2½ to 3 pound whole chicken and use it to make this entire dish. First, roast the chicken using the technique here. Strip the meat from the legs and thighs (keep the skin!) and refrigerate for later. Then, take the chicken carcass and make broth using the technique here. When you’re ready to make this meal, start at the cacciatore instructions above, adding the roasted meat to the sauce and simmering for just 10 minutes to heat it all the way through. This reduces the cooking time to just 15 minutes, and makes the most of the whole chicken. chicken chowder SERVES 2 (WITH LEFTOVERS) PREP TIME: 20 minutes COOK TIME: 25 minutes TOTAL TIME: 45 minutes ½ teaspoon salt ½ teaspoon cumin ¼ teaspoon paprika ⅛ teaspoon cayenne 1 pound chicken thighs (boneless) 1 quart chicken or vegetable broth 2 medium sweet potatoes, 1-inch cubed 1 head broccoli cut into 1-inch pieces (save stems) 2 cloves garlic, minced 1 jalapeño, finely diced (optional) 1 14.5-ounce can coconut milk 1 tablespoon fresh cilantro, minced 1 lime, juiced ½ small red onion, finely chopped Want to add a different flavor to this meal? Try grilling your chicken instead of roasting it, substitute chicken for shrimp or hard-boiled eggs, or use cauliflower instead of broccoli. You can also turn this into a chicken “noodle” or “rice” chowder by adding pre-cooked Cauliflower Rice, Roasted Spaghetti Squash, or zoodles just before the final reheat. PREHEAT the oven to 350°F. MIX the salt, cumin, paprika, and cayenne in a small bowl. Season the chicken thighs evenly with the spice mixture. Place the chicken in a baking pan and roast for 20 minutes. Remove the chicken from the oven and let it rest for 5 minutes on a cutting board. Cut the chicken into 1-inch cubes. WHILE the chicken is roasting, add the broth to a medium-sized pot. Bring to a boil, then add the sweet potatoes. Cook over high heat until the sweet potatoes are fork-tender, about 10 minutes. Remove the sweet potatoes from the broth with a slotted spoon and set them aside. ADD the broccoli stems, garlic, and jalapeño (if you want the extra kick) to the broth. Reduce the heat to medium high and boil for 15 minutes. Add the broccoli florets and coconut milk, and continue to boil until the broccoli is very tender, about 5 minutes. Remove the pot from the heat. TRANSFER the broth and vegetables from the pot to a food processor or blender and blend until smooth. Place the blended mixture back into the pot and add the cooked chicken, sweet potatoes, and cilantro. Return the pot to medium heat, stir well, and cook for 2 to 3 minutes to reheat the chicken and sweet potatoes. Serve immediately. GARNISH the chowder with the fresh lime juice and finely chopped red onion. ✪YOU CAN bring this dish to work for a hot lunch even if you don’t have a microwave. Before you leave for the day, heat the soup on medium-low heat until it’s hot but not boiling, then place in a double-walled thermos. The thermos will keep it hot until lunchtime. chicken primavera SERVES 2 (WITH LEFTOVERS) PREP TIME: 15 min COOK TIME: 27 min TOTAL TIME: 42 min 2 tablespoons cooking fat ½ cup diced onions 2 cloves garlic, minced 1 teaspoon minced fresh oregano 1 teaspoon fresh thyme 3 cups diced seeded tomatoes (about 3 large tomatoes) 1 pound boneless, skinless chicken thighs, 1-inch diced 2 cups green beans, cut into 1-inch pieces 1½ cups medium-diced zucchini 1½ cup medium-diced yellow squash ¼ teaspoon red pepper flakes 1 teaspoons salt ½ teaspoon black pepper 1 to 2 tablespoons minced fresh basil leaves This meal is just begging to be spooned over vegetable noodles. Serve over Roasted Spaghetti Squash, zucchini noodles, or use your spiral slicer and steam some sweet potato or carrot noodles. IN a large pot or Dutch oven, heat the cooking fat on mediumhigh heat and swirl to coat the bottom of the pan. Add the onions, garlic, oregano, and thyme and cook until the onions are translucent and the garlic is fragrant, 2 to 3 minutes. ADD the tomatoes and chicken to the pot and cook, stirring occasionally, until the tomatoes have softened, 3 to 4 minutes. Add the green beans, zucchini, and squash and cook, stirring occasionally, until the vegetables are crisp-tender and the chicken is cooked through (with no pink remaining in the center), 5 to 6 minutes. Add the red pepper flakes, salt, and pepper, sprinkle on the basil, stir for 30 seconds to incorporate, and serve immediately. ✪TAKE SOME SHORTCUTS Take 5 minutes off your prep time by using a 28-ounce can of diced tomatoes instead of fresh. (Don’t drain them—just toss the whole can in the pot in step 2.) And while fresh herbs really make a flavor difference here, if you’re short on time, substitute ½ teaspoon each of dried oregano and thyme, and 1 to 2 teaspoons of dried basil. stir-fry chicken SERVES 2 PREP TIME: 10 minutes COOK TIME: 10 minutes TOTAL TIME: 20 minutes 3 tablespoons cooking fat 1 pound chicken breast or thighs (boneless, skinless) 1 clove garlic, minced 1 tablespoon ginger, grated 1 head broccoli florets 2 cups mushrooms, sliced 2 carrots, julienned ½ pound green beans, cut into 1-inch pieces 2 green onions, minced ½ lime, juiced 1 tablespoon minced fresh cilantro This simple dish is the perfect base for your favorite dressing or sauce. Double the recipe, select two different dressings, and you’ve got dinner and tomorrow’s lunch covered. Hot stir-fry also goes well over a crisp, cold salad. Use your favorite sturdy salad greens (try Boston, Bibb, butter, or romaine), thinly sliced cabbage, or a pre-cut cole slaw mix and top with our Herb Citrus Vinaigrette or Latin Marinade. Want something other than chicken? Try using thinly sliced flank steak or shrimp instead. HEAT 2 tablespoons of the cooking fat in a large skillet over medium heat, swirling to coat the bottom of the pan. Place the chicken in the pan and sear until the outside is browned and it lifts easily from the bottom of the skillet, about 3 minutes on each side. Add the garlic and ginger. Cook and stir until aromatic, about 1 minute. Remove the chicken from the pan and slice into thin strips. Set the sliced chicken aside. WIPE the pan clean and dry. HEAT the remaining 1 tablespoon of cooking fat in the skillet over medium-high heat. Add the broccoli, mushrooms, carrots, and green beans and quickly stir-fry until the vegetables begin to soften, 2 to 3 minutes. Add the chicken strips to the pan; mix, and continue to cook for 2 to 3 minutes until everything is heated through. TOP with the green onions, lime juice, and cilantro. Serve immediately. ✪CUT YOUR PREP AND COOK TIME in half by using pre-cooked chicken or shrimp and replacing the fresh vegetables with a frozen vegetable mix. Let the vegetables thaw in the fridge while you’re at work—when it’s time to cook, follow the instructions above, stirfrying until everything is heated through. classic chili SERVES 2 (WITH LEFTOVERS) PREP TIME: 20 minutes COOK TIME: 1 hour 15 minutes TOTAL TIME: 1 hour 35 minutes 1 pound ground meat (beef, lamb, bison) 1 onion, finely chopped 3 cloves garlic, minced 1 teaspoon cumin 1 teaspoon chili powder ½ teaspoon paprika ½ teaspoon mustard powder ½ teaspoon salt 1 red bell pepper, finely chopped 1 green bell pepper, finely chopped 1 can (14.5 ounces) diced tomatoes 2 cups beef broth Different garnish options can really change the flavor of this dish. Try topping with fresh cilantro, jalapeños, crushed red pepper, or a drizzle of Ranch Dressing. If you’re active and need to eat more carbohydrates, cut some potatoes or butternut squash into small cubes and add them to the pot just before simmering, or serve your chili in a “bowl” of roasted acorn squash halves. HEAT a large pot or high-walled skillet over medium-high heat (without cooking fat). Add the ground meat and cook until the meat is fully browned, 7 to 10 minutes. Remove the meat from the pot with a slotted spoon and transfer it to a side dish, keeping the leftover fat in the pot. ADD the onions, garlic, cumin, chili powder, paprika, mustard powder, and salt to the pot. Reduce the heat to medium low and cook until the onions are translucent, 4 to 5 minutes. ADD the bell peppers, tomatoes, and broth. Turn the heat up to high. When the chili reaches a boil, reduce the heat to low and simmer uncovered for 1 hour. ✪THIS RECIPE can easily be made in a slow cooker. Follow all of the directions exactly as above, up to the point when your onions are translucent. At that point, transfer the contents from the pot to your slow cooker. Add the bell peppers, tomatoes, and broth and set to low heat, cooking for 6 to 8 hours. roasted pork shoulder with butternut squash, kale, and tomatoes SERVES 2 (WITH LEFTOVERS) PREP TIME: 10 minutes COOK TIME: 3 hours TOTAL TIME: 3 hours 10 minutes
2 teaspoons paprika 1 teaspoon chili powder 1 teaspoon garlic powder 1 teaspoon onion powder 1 teaspoon salt ½ teaspoon black pepper ½ lime, juiced 1½ pounds pork shoulder (boneless) 1 butternut squash, 1-inch diced 1 bunch kale, stems removed, leaves chopped 1 cup diced tomatoes If you have leftover pork or if you make a double batch, freeze the pork in 1-cup servings so you can easily thaw it for future meals. You can serve the leftover pork with our Tangy BBQ Sauce in lettuce cups, over a salad with our Latin Vinaigrette, topped with fried eggs and Chimichurri, or added to a Vegetable Frittata. If butternut squash isn’t in season, substitute two diced sweet potatoes. PREHEAT the oven to 300°F. MIX the paprika, chili powder, garlic powder, onion powder, salt, and pepper in a small bowl. Add the lime juice and stir. Place the pork in a Dutch oven or deep roasting pan and coat all sides of the pork with the spice mixture. Add 1 cup of water and cover tightly with a lid or aluminum foil. Cook in the oven, turning the pork shoulder in the pan every 45 minutes. AFTER 2 hours and 15 minutes, add the butternut squash and ½ cup of water to the Dutch oven or pan. Cook for 30 more minutes, then add the kale and tomatoes. Place back in the oven for 15 minutes more. REMOVE the pan from the oven and leave covered until you are ready to serve. With tongs or a slotted spoon, arrange the vegetables on plates, then break the pork apart into generous chunks and place over the vegetables. Spoon the braising liquid from the pan over the pork. ✪PORK SHOULDER cuts also include Pork Butt, Boston Butt, and Picnic Shoulder Roast. These cuts all come from the same area, but include different sizes and portions of the shoulder muscles. If you can’t find a cut labeled specifically “pork shoulder,” any of these cuts would work. no-fuss salmon cakes created by Melissa Joulwan for It Starts With Food SERVES 2 PREP TIME: 15 minutes COOK TIME: 30 minutes TOTAL TIME: 45 minutes 3 6-ounce cans wild-caught salmon (boneless, or bones removed) 1 cup canned sweet potatoes 1 egg ½ cup almond flour 2 scallions, thinly sliced, plus extra for garnish 2 tablespoons fresh parsley, minced (or 2 teaspoons dried) 2 tablespoons fresh minced dill (or 2 teaspoons dried) 1 teaspoon salt ½ teaspoon paprika ¼ teaspoon ground black pepper 2 tablespoons clarified butter, ghee, or coconut oil, melted Lemon wedges for serving (optional) While these salmon cakes are a complete meal on their own (especially topped with Tartar Sauce), they pair well with sautéed green beans and a fresh garden salad, our Grilled Asparagus with Lemon Zest, or Roasted Sweet Potatoes. They also reheat beautifully, so make a double-batch and enjoy these for breakfast the next day—top two cakes with some wilted spinach and a fried egg. PREHEAT the oven to 425°F and cover a large baking sheet with parchment paper. DRAIN the liquid from the salmon and crumble the fish into a large mixing bowl, removing the bones and flaking the fish with a fork. Add the sweet potato, egg, almond flour, scallions, parsley, dill, salt, paprika, and pepper and mix well with a wooden spoon. BRUSH the parchment paper with the melted fat, then use a ⅓- cup measuring cup to scoop the cakes and drop them onto the parchment. Flatten the patties with your hand until they are uniform in thickness. BAKE for 20 minutes, then flip each patty with a spatula and return to the oven. Bake until golden brown, about 10 more minutes. SERVE with sliced scallions and lemon wedges for squeezing over the top, if desired. ✪YOU CAN FIND de-boned canned salmon at your local health food store—that will save you about 10 minutes of prep time. Look for wild-caught to ensure you’re getting the highest level of nutrition, especially anti-inflammatory omega-3 fatty acids like EPA and DHA. These fatty acids come from the food wild salmon eat, like algae and krill. Farmed salmon don’t eat these foods, so they don’t contain the same healthy fats. pot roast SERVES 2 (WITH LEFTOVERS) PREP TIME: 15 minutes COOK TIME: 6 to 8 hours TOTAL TIME: 6 to 8 hours 1½ pounds beef roast (chuck, boneless short ribs, brisket, top round, rump) 1 teaspoon salt ½ teaspoon black pepper 1 onion, sliced 3 carrots, unpeeled and cut into 2-inch pieces 3 stalks celery, cut into 1-inch pieces 1 small butternut squash, peeled and large-diced 2 cloves garlic 2 sprigs thyme 2 cups beef broth or water If you have the time, you can add even more flavor to your roast by browning the meat, onions, and carrots before adding to the slow cooker. Set the slow cooker to low heat, and season your roast with salt and pepper. Melt 2 to 3 tablespoons of clarified butter or coconut oil in a large pot (or Dutch oven) over mediumhigh heat. Add the onions and (without stirring), sear them for 1 minute on one side, then flip using a wide spatula and sear the other side for 1 minute. (Onions should be slightly browned.) Remove from the pan, add the carrots, repeating the process, until carrots are also browned. Add 1 tablespoon of cooking fat, and add the roast to the pan. Sear it for 1 minute on all sides, until browned. Follow the rest of the above instructions. SET your slow cooker to low heat, and season your roast with the salt and pepper. ADD the beef roast, onions, carrots, celery, butternut squash, garlic, and thyme sprigs to the slow cooker. Top with the broth or water (or enough to cover the roast halfway) and leave the roast to cook for 6 to 8 hours. The roast should be fork-tender when done. REMOVE the roast, transfer to a large plate or serving dish, and cover with foil. Allow the meat to rest for 15 minutes before serving. REMOVE the thyme springs from the broth and discard. Slice the roast against the grain. Divide the meat and vegetables on individual plates, and ladle broth over the top. ✪JUST LIKE WOOD, meat also has grain—muscle fiber bundles that are thicker and more prominent in harder-working muscle meat like the cuts that go into a beef roast. Cutting parallel to the grain (along the same lines as the grain) can make your meat much tougher. Instead, cut against the grain (perpendicular to those lines), to naturally soften up the meat and retain a much more tender texture. shepherd’s pie SERVES 2 (WITH LEFTOVERS) PREP TIME: 10 minutes COOK TIME: 50 minutes TOTAL TIME: 1 hour 2 medium sweet potatoes, peeled and large-diced 4 cups cold water 4 tablespoons clarified butter or ghee ½ cup coconut milk 1 onion, finely chopped 2 stalks celery, finely chopped 1 carrot, peeled and finely chopped 1 pound ground meat (beef, lamb, bison) 2 cloves garlic, minced 1 teaspoon salt ½ teaspoon black pepper 1 sprig fresh thyme leaves (or ¼ teaspoon dried thyme) 2 teaspoons fresh oregano leaves (or ½ teaspoon dried) For a lighter dish, use Mashed Cauliflower instead of sweet potato for the top layer. You can also use mashed white potatoes for a more traditional feel. Crumble some crispy prosciutto or Whole30-compliant bacon (see Resources) over the top, or serve with our Whole30 Ketchup for a kid-friendly meal. This dish freezes and reheats beautifully, so consider doubling the recipe, making one to eat and one to freeze. PREHEAT the oven to 375°F. IN a large pot, place the sweet potatoes in the cold water and bring to a boil. Boil until the potatoes are fork-tender, about 10 minutes. Drain the water from the pot, add 2 tablespoons of the butter and the coconut milk (away from the heat). Mash the potatoes with a potato masher, large kitchen fork, or immersion blender, or blend them in a food processor for a creamier texture. Transfer the potatoes to a bowl and set aside. RETURN the same pot to the stove on medium heat, and melt the remaining 2 tablespoons of butter. Add the onions, celery, and carrots and cook, stirring, for 5 minutes. Add the ground meat and garlic. Cook, stirring often, until the meat is browned, 7 to 10 minutes. Season with the salt, pepper, thyme leaves, and oregano. Remove from the heat and let the meat and veggies cool in the pot for 5 minutes. SPOON the meat and vegetable mixture evenly over the bottom of a casserole dish or 9×12-inch glass baking dish. Carefully spread the mashed sweet potatoes over the top of the meat and vegetable mixture. Roast in the oven for 30 minutes, letting the top brown slightly. Cut into slices and serve. ✪MOVE YOUR OVEN RACK up one slot from the middle position to create more of a golden-brown crust on the mashed potatoes. Want to really fancy it up? Use the tines of a fork to press a design into your sweet potato before cooking. thai coconut soup SERVES 2 PREP TIME: 20 minutes COOK TIME: 40 minutes TOTAL TIME: 1 hour 2 quarts chicken or vegetable broth 1 stalk lemongrass, cut into 2-inch pieces
1 small ginger root, peeled and cut into 1-inch pieces 1 shallot or 1 small red onion, diced 1 jalapeño, seeded and halved 4 limes, zested and halved 1 pound chicken thighs (boneless), cut into 1-inch cubes 1 14.5-ounce can coconut milk 3 cups mushrooms, quartered 1 red bell pepper, diced 1 parsnip, cut into ¼-inch coins 1 carrot, cut into ¼-inch coins 1 teaspoon salt 1 green onion, finely chopped 1 tablespoon finely chopped fresh cilantro Want more spice? De-seed and finely dice another jalapeño and toss it in when you add the chicken. Craving some seafood? Use shrimp, scallops, or a firm white fish instead. Need more greens? Add a bag of baby spinach or a few handfuls of zucchini noodles just as you’re pulling it off the stove, letting them wilt in the hot broth before garnishing and serving. IN a large pot, bring the water, lemongrass, ginger, shallot, jalapeño, and 6 of the lime halves to a boil. Reduce the heat to medium and let simmer uncovered for 15 minutes. STRAIN the lemongrass, ginger, shallot, jalapeño, and limes from the broth. Add the chicken, coconut milk, mushrooms, bell pepper, parsnip, carrot, and salt to the broth. Cook over medium-high heat until the chicken is cooked through and the carrots and parsnips are tender, about 25 minutes. SPOON into bowls and garnish with the green onion, cilantro, lime zest, and the juice of the remaining two lime halves. ✪DON’T BE INTIMIDATED by lemongrass. This woody plant with a lemony scent is a common addition to Thai recipes. To use it, cut off the lower bulb and remove the tough outer leaves, leaving just the yellow center. Find this (and lots of other interesting herbs and spices) at your local health food store or Asian market—but if you can’t find it, just add more ginger root and half of the lime zest to the broth instead. FANCYPANTS MEALS AT SOME POINT during your Whole30, you ’re probably going to want to entertain. Maybe it’s your turn to cook a family dinner, or there’s a birthday smack in the middle of your Whole30, or maybe you just want to silence family and friends who keep saying, “You can’t eat anything! You must feel so deprived. I could never eat like that.” Whatever the reason, we’ve got you covered. Each of these fancypants meals are complete, start to finish —your main course, plus side dishes. (Some even have appetizers.) We’ll give you a game plan for each one, helping you figure out prepping and planning so you’re not ignoring your guests, distracted by a smoking frying pan. Unless you’re an experienced cook, we recommend saving these meals until you’re a week or two into your Whole30, and have some experience planning, prepping, and cooking several dishes at once. However, don’t wait too long! Pulling off a meal like this will boost your kitchen confidence, and assure your loved ones that no, you’re not starving, deprived, or miserable while on the Whole30. In fact, if you didn’t tell your guests you just served them a Whole30 meal, we doubt anyone would even notice—which might open the door to conversations like, “Did you like it? Oh, it was delicious, was it? Well guess what? That entire meal was Whole30. So now that you know the food is amazing and understand that you’re not deprived in any way. What’s stopping you from trying it, Mom?” Sharing the Good Food word via sneak attack is a totally valid strategy in our book. recipes dallas’s watermelon salad pesto shrimp with cherry tomatoes dry-rubbed grilled steak grilled vegetables with balsamic glaze seared scallops with ginger-blueberry sauce cabbage, kale, and bell pepper slaw with apple cider vinaigrette coconut cauliflower rice lemongrass chicken skewers braised beef short ribs short rib–stuffed peppers, sun-dried tomatoes, portabella mushrooms, and anchovies bone-in leg of lamb cauliflower-broccoli mash roasted beets with grapefruit-thyme vinaigrette green beans with fig vinaigrette butternut squash puree sausage, apple, and acorn squash casserole creamed spinach roasted turkey with gravy FANCYPANTS MEALS backyard barbecue MENU Dallas’s Watermelon Salad Pesto Shrimp with Cherry Tomatoes Dry-Rubbed Grilled Steak Grilled Vegetables with Balsamic Glaze NOTHING SAYS SUMMERTIME like a backyard barbeque, but your food game has stepped up significantly since the days of burned hot dogs, soggy potato chips, and cans of soda. Have the family or friends over for our cookout and they ’ll be impressed with your creative menu without even realizing they ’ ve eaten their first Whole30 meal. Sneaky, right? This meal demands some prep ahead of time, though. First, unless you’ve got major grill experience, you may want to cook a few practice steaks before the big event. It’s likely that your guests will all want their steaks cooked to different temperatures, and every grill is different, and our recommended cooking times may be slightly off for your particular set up—so get in there a week or two before the event and make some test steaks. (It’s not so bad—you get to eat your practice runs.) You’ll also want to invest in some good grill tools, including a wire brush, a set of long tongs, and that grill basket we mentioned. Yes, you could cook veggies right on the grate of the grill using the technique we outlined here, but we guarantee you’ll have casualties, and a grill basket is so much easier. Finally, make sure your grill is clean before the big day. A dirty grill makes your food stick, preventing that nice sear you’re trying to achieve, and can put off a lot of smoke—or fire! A few days before the event, heat your grill to high and, once it’s hot, clean the grates with a wire brush. (You can also do this the next time you actually cook something out there.) Then, apply a very light coating of extra-virgin olive oil to protect the grates until the next use. THE NIGHT BEFORE OR MORNING OF YOUR EVENT, BEGIN YOUR MEAL PREPARATIONS: Prepare the pesto Prepare the balsamic glaze Make the watermelon salad Mix the spices for the dry rub Chop all the veggies for the grill basket OPTIONAL: Mix up a pitcher of mocktails OPTIONAL: Make your favorite dipping sauce and cut some raw veggies STORE everything in covered containers in the fridge, except the balsamic glaze and the spice mixture—those you can leave on the counter. AS FOR TIMING, these dishes are pretty easy to manage. First, pull the pesto out of the fridge and start marinating the steaks in the dry rub about an hour before guests arrive. Begin cooking the shrimp 15 to 20 minutes before your party’s starting time, so you can lay out your appetizer as people are walking in the door. WHEN YOU’RE ABOUT 30 MINUTES FROM MEALTIME, preheat the grill and oven, then sear the steaks on the grill. Hand the steaks off to someone to stick in the oven while you transfer the grill basket full of vegetables to the grill. The veggies may take longer than the steaks to cook (especially if you like your steaks rare), but allowing them to rest a few more minutes won’t hurt. DON’T FORGET ABOUT THE WATERMELON SALAD! It may just be the best part of the whole meal. (Dallas created it after tasting a similar dish at a Mexican restaurant in Seattle.) Leave it in the fridge until just before serving, as it’s tastiest when it’s cold. SERVE EVERYTHING FAMILY STYLE, inviting your guests to bring their plates to the food. (This is a barbeque! No need to be formal.) You can simply point out which steaks are done to which temperature, and let guests help themselves to the side dishes. dallas’s watermelon salad SERVES 4 PREP TIME: 10 minutes CHILL TIME: 20 minutes TOTAL TIME: 30 minutes 2 pounds watermelon, cut into large dice 2 tablespoons extra-virgin olive oil Juice of 2 limes Leaves from 4 sprigs fresh mint, finely chopped ½ serrano chile pepper, seeded, finely sliced (optional) PLACE all of the ingredients in a large non-reactive bowl and use a wooden spoon to combine. Cover and chill in the refrigerator for at least 20 minutes before serving. The salad can also be made up to one day ahead of time. pesto shrimp with cherry tomatoes SERVES 4 PREP TIME: 25 minutes COOK TIME: 10 minutes TOTAL TIME: 35 minutes 2 tablespoons cooking fat ¼ onion, finely chopped 1 clove garlic, minced ¾ pound (21 to 25) raw shrimp, peeled and deveined 2 cups cherry or grape tomatoes, cut in half 1 cup Pesto HEAT the cooking fat in a large skillet over medium heat. When the fat is hot, add the onion and cook, stirring, for 2 minutes. Add the garlic and cook until aromatic, about 1 minute. Add the shrimp and toss to coat with the onion and garlic. Let the shrimp cook for about 1 minute, then add the tomatoes. Add ¼ cup water, cover, and cook until the shrimp are bright pink and in the shape of a “C” and the tomatoes are tender and starting to wrinkle, 4 to 6 minutes. TRANSFER the contents of the pan to a serving dish, and toss with the pesto. dry-rubbed grilled steak SERVES 4 PREP TIME: 5 minutes MARINATE TIME: 15 to 30 minutes COOK TIME: 15 to 25 minutes TOTAL TIME: 20 to 30 minutes, plus marinating 3 tablespoons salt 2 tablespoons paprika 2 teaspoons dried oregano 2 teaspoons ground mustard 2 teaspoons onion powder 2 teaspoons black pepper 1 teaspoon ground turmeric 1 teaspoon garlic powder ¼ teaspoon cayenne pepper 4 steaks (5 to 8 ounces each) for grilling (sirloin, strip, rib eye, tenderloin) TO make the dry rub, mix all the seasonings together in a small bowl. Reserve 2 tablespoons and store the rest in an airtight container. Good news—you can make this weeks ahead of time. Feel free to double the recipe and save more of the rub for the next time you grill. SEASON each steak evenly on both sides using 1½ teaspoons of the dry rub. Let the steaks marinate at room temperature for 15 to 30 minutes. WHILE the steaks are marinating, preheat the grill to high heat (500°F) and the oven to 350°F. LAY the steaks on the hot grill at a 45-degree angle to the grates. Let the steaks sear for 2 to 3 minutes—you’ll know a steak is ready to move when it pulls off the grates easily. When ready, use grill tongs to turn the steaks 90 degrees, and sear for 2 more minutes. This creates a nice pattern of grill marks on the steaks. Flip the steaks and repeat the two-step searing process on the other side. TRANSFER the steaks to a baking sheet or cast-iron skillet. Place the baking sheet or skillet in the oven and bake for 8 to 12 minutes, depending on the thickness of the steak and the desired temperature (see chart for guidelines). Use a meat thermometer until you learn how to judge this by the look and feel of the steak. Remember to pull the steak out of the oven when it’s 5°F below the desired temperature, as it will continue to cook as it rests. LET the steaks rest at room temperature for 5 minutes before serving. grilled vegetables with balsamic glaze SERVES 4 PREP TIME: 20 minutes COOK TIME: 35 minutes TOTAL TIME: 55 minutes 1 cup balsamic vinegar 1 bunch asparagus, ends trimmed, cut into 1-inch pieces 1 zucchini, cut into large dice 1 yellow squash, cut into large dice 1 sweet or yellow onion, cut into 1-inch slices 2 bell peppers, seeded, ribs removed, and cut into 1-inch slices ¼ cup extra-virgin olive oil ½ teaspoon salt ½ teaspoon black pepper 2 tablespoons finely chopped fresh parsley TO make the balsamic glaze, bring the vinegar to a boil in a small saucepan over medium-high heat. Turn the heat down to medium low and simmer until the balsamic is reduced by about half, 20 to 30 minutes. Remove from the heat, allow to cool, and reserve. (You can do this up to a week ahead of time; store in a covered container at room temperature.) TO grill the vegetables, preheat the grill to high heat (500°F). PLACE the asparagus, zucchini, squash, onion, and peppers in a large bowl and drizzle in half the olive oil. Toss or mix the vegetables with your hands until they are well coated, place in a grill basket. PLACE the basket on the grill and close the lid. Grill for 15 to 20 minutes, shaking the grill basket occasionally. You’re done when the peppers and onions are charred on the edges and tender enough to eat. PLACE the vegetables in a serving bowl. Drizzle evenly with ¼ cup of the balsamic glaze and the remaining olive oil. Season with the salt and pepper and garnish with the parsley. Serve warm or at room temperature. ✪GRILL TECHNIQUES If you’ve got decent grill experience (or an extra set of hands to help), you can slice the vegetables and grill them right on the slats, as described in the technique for Perfect Grilled Vegetables. It’s a little more work, but this method will impart those pretty char marks on your vegetables (as in our photo) and lets you throw some fruit (like slices of pineapple or mango) into the mix, too. FANCYPANTS MEALS date night MENU Seared Scallops with Ginger-Blueberry Sauce Cabbage, Kale, and Bell Pepper Slaw with Apple Cider Vinaigrette Coconut Cauliflower Rice Lemongrass Chicken Skewers THIS DATE NIGHT DISH is our only Fancypants Meal that serves two—just double the ingredients if you ’ ve got chaperones. We set this one up for you so that you can prepare most of it the day before or morning of, leaving you more time to entertain your date. (The last thing you want is to be distracted by searing scallops as he or she is walking in the door!) Here’s how we’d set this one up: The morning of your date, prepare the marinade and marinate the chicken in the fridge. You’ll also want to prepare the vinaigrette and the slaw, storing the dressed dish in a serving bowl or glass container in the fridge. We’d also make a pitcher of infused water—add some orange slices and mint leaves to plain old water, and let it infuse in the refrigerator or on the counter. Plan on serving everything out of serving dishes, instead of straight from the stove. It’s extra clean up, but it’s classier, and avoids the awkward waiting-for-your-turn-by-the-stove scenario. A half-hour before your date is due to arrive, start soaking your wooden skewers (if necessary), do your mise-en-place for the cauliflower rice by pulsing the florets, chopping the onion, and measuring out the coconut milk and shredded coconut. Set these items in individual bowls by the stove, clean your food processor so it’s ready for the blueberry sauce, and thread the chicken onto the skewers and place on a baking sheet. Five minutes before your date is due to arrive, preheat the oven to 350°F. The goal is to put the chicken appetizer in the oven as he or she is walking in the door, giving you time for a relaxed greeting and drink offerings while filling the kitchen with the inviting scent of lemongrass chicken. Offer your date a seat as you pull the slaw out of the fridge, and the chicken out of the oven. Have a pretty serving plate ready for the chicken, and sit and talk while you both enjoy the appetizer. Don’t rush—you have all night, and you want to enjoy both the meal and the social experience. When you’re ready, it’s time to impress your date with kitchen wizardry. A polite date will ask to help, so have him or her transfer the slaw to a serving bowl, and set the table. (In fact, ask for help if it isn’t offered: It may feel like too much pressure if your date just sits there and watches you cook.) Don an apron—blueberry juice is very hard to remove from clothing—and get your cauliflower rice started while you chop the ginger and prepare the blueberry sauce. While the sauce is cooking, you can season the scallops* with salt and pepper. After you’ve got the blueberry sauce blended and staying warm in a small pot and the cauliflower rice simmering, it’s time to cook the scallops. Have another serving dish ready, in case you have to cook them in batches. Cook the scallops and place in the serving dish when done. Add the warm blueberry sauce to a small pitcher or bowl, transfer the coconut cauliflower rice to a serving bowl, and bring everything to the table—the scallops, the sauce, the rice, and the slaw—with the appropriate serving tools. Your table should already be set, so all that’s left is to top off your waters, light some candles, and gracefully accept the compliments from your date. *If your date is allergic to shellfish, you can substitute Perfect Oven-Baked Salmon for the scallops. When the chicken comes out, turn the oven up to 450°F. Put the salmon in the oven when you start preparing the blueberry sauce—it should all be done around the same time. BACK seared scallops with gingerblueberry sauce SERVES 2 PREP TIME: 10 minutes COOK TIME: 10 to 15 minutes TOTAL TIME: 25 minutes FOR THE GINGER-BLUEBERRY SAUCE 1 cup fresh or frozen blueberries 1½ teaspoons finely chopped fresh ginger ¼ teaspoon salt FOR THE SCALLOPS ¾ pound sea scallops, patted dry ½ teaspoon salt ½ teaspoon black pepper 3 tablespoons cooking fat TO MAKE THE GINGER-BLUEBERRY SAUCE: Defrost your blueberries (if necessary), then combine with 1 cup of water in a small saucepan over medium-high heat. Let the mixture reach a boil, then add the ginger and salt. Reduce the heat to medium and cook for 5 minutes, letting the blueberries burst and release their juice and the ginger steep. The sauce can be left chunky, but it looks prettier if you blend it in a food processor or with an immersion blender to a smooth consistency. Just return it to the pan after blending to keep warm. TO MAKE THE SCALLOPS: Season both sides evenly with the salt and pepper. Heat the cooking fat in a large skillet over medium-high heat. When the fat is hot, add the scallops in a single layer (you may need to cook them in batches). Cook until the scallops begin to pull away from pan and brown, 2 to 3 minutes. Using kitchen tongs, turn the scallops and repeat the searing on the other side, for another 2 minutes. TRANSFER the scallops to a serving dish or individual plates. Top with ¼ to ½ cup of the blueberry sauce. Serve warm or at room temperature. cabbage, kale, and bell pepper slaw with apple cider vinaigrette SERVES 2 PREP TIME: 20 minutes FOR THE VINAIGRETTE ¾ cup extra-virgin olive oil ¼ cup apple cider vinegar 2 tablespoons finely chopped fresh parsley 1 clove garlic, minced Salt and black pepper FOR THE SLAW ½ head red cabbage, finely shredded 1 bunch kale, stems removed, ribbon chopped ½ bell pepper, seeded, ribs removed, and cut into very thin strips ½ cup shredded carrots ½ cup julienned apple 2 tablespoons slivered almonds 1 teaspoon salt ½ teaspoon black pepper TO MAKE THE VINAIGRETTE: Combine the olive oil, vinegar, parsley, and garlic in a salad dressing bottle or bowl. Shake or mix well, until the olive oil is thoroughly incorporated. Season with salt and pepper. TO MAKE THE SLAW: Combine the cabbage, kale, bell pepper, carrots, apple, and almonds in a medium mixing bowl. Mix well and toss with ½ cup of the vinaigrette. Season with the salt and pepper. CHILL in the refrigerator for at least 30 minutes before serving. You can make the vinaigrette and the slaw up to one day ahead of time. Use the extra vinaigrette to refresh the flavor of leftover slaw, or store it in the refrigerator for up to 5 days. coconut cauliflower rice SERVES 2 PREP TIME: 10 minutes COOK TIME: 15 minutes TOTAL TIME: 25 minutes 1 head cauliflower, cut into florets 2 tablespoons coconut oil, ghee, or clarified butter ¼ onion, finely chopped 1 cup coconut milk ¼ cup shredded coconut flakes ½ teaspoon salt ¼ teaspoon black pepper 1 tablespoon finely chopped cilantro TO “rice” the cauliflower florets, pulse in a food processor until they turn into small, ricelike pieces, 20 to 25 pulses. (You’ll want to do this in two batches. Don’t overcrowd the cauliflower in the food processor, and don’t over-pulse or the florets will get mushy.) IN a large skillet, melt the cooking fat over medium heat and swirl to coat the bottom of the pan. When the fat is hot, add the onion and cook, stirring, until translucent, 2 to 3 minutes. Add the riced cauliflower and coconut milk and mix thoroughly. Cover and steam until the coconut milk has been absorbed by the rice and the cauliflower is tender, about 10 minutes. (The best way to test for doneness is to eat a bite!) Scrape up any brown bits from the bottom of the pan with a wooden spoon and mix into the rice. REMOVE the pan from the heat and mix in the shredded coconut, salt, and pepper. Gently stir in the chopped cilantro and serve warm. lemongrass chicken skewers SERVES 2 PREP TIME: 20 minutes MARINATE TIME: 20 minutes to 24 hours COOK TIME: 8 to 12 minutes TOTAL TIME: 30 minutes, plus marinating 2 tablespoons coconut oil 1 teaspoon sesame oil 1 cup roughly chopped trimmed lemongrass 2 tablespoons chopped green onions 1½ teaspoons grated fresh ginger 1 clove garlic, minced Juice of ½ lime ½ pound boneless, skinless chicken breast, cut into 1-inch strips 1 tablespoon cooking fat (melted, if necessary) ½ teaspoon salt ¼ teaspoon black pepper IF using wooden skewers, soak them in water for 30 minutes to 1 hour to prevent them from burning. TO make the marinade, heat the coconut oil and sesame oil in a large skillet over medium heat. When the oil is hot, add the lemongrass, green onions, ginger, and garlic and cook, stirring, for 1 minute to release the flavor. Remove from the heat and stir in the lime juice. Allow the pan to cool for 5 minutes. PLACE the chicken strips in a glass storage dish or plastic bag and pour the marinade over the chicken. Seal the bag or cover the dish and marinate the chicken at room temperature for at least 20 minutes, or in the refrigerator overnight. PREHEAT the oven to 350°F. Line a baking sheet with foil. REMOVE the chicken from the refrigerator and discard the excess marinade. CUT the marinated chicken into 1-inch pieces and thread onto the skewers. Arrange the skewers on the baking sheet, brush with the cooking fat, and season with salt and pepper. Bake for 8 to 12 minutes, until the chicken is cooked through and no pink remains in the center of the strips. Serve as an appetizer. ✪ IF YOU can’t find lemongrass at your local Asian market, don’t stress. Just double the ginger and add the zest from one lime. FANCYPANTS MEALS tapas party MENU Short Rib–Stuffed Peppers Sun-Dried Tomatoes Portabella Mushrooms Anchovies WE CERTAINLY don’t want you living in social isolation during your Whole30, but the idea of going to (or hosting!) a party may be intimidating. We promise, it’s easier than you think, even though your days of serving corn chips alongside a jar of nacho cheese dip as “party fare” are long in the past. If not, they really should be. Allow us to help. This dish is perfect to bring to a potluck, or as the main course for a book club meeting, baby shower, or football party. As it’s just as good served cold as warm, you have a lot of flexibility in how far in advance you prepare the cooked ingredients. For now, let’s assume you’re having a small 7:00 p.m. get-together at your house and you’ll be serving the cooked foods warm. The ribs will take 8 hours in the slow cooker, so start preparations in the morning, and put the ribs in to cook by 10:30 a.m. After you get the ribs going, prepare the balsamic glaze. This isn’t hard—once it boils, just reduce the heat to low, set a kitchen timer for 20 minutes, and go about your business. In fact, use this time to prepare the balsamic vinaigrette, too! When the glaze is done, allow it to cool, then transfer to a sealed storage container, and leave on the counter or in your pantry— no need to refrigerate. Around 5:15 p.m., preheat the oven and start marinating the mushroom caps in the balsamic vinaigrette (the dressing, not the glaze). Coat the peppers with olive oil and put in the oven at 5:30. You’ll pull your peppers out to cool around 6:10 p.m., give or take. The mushrooms go in the oven at the same time, on the same pan. At 6:30, the mushrooms come out and start cooling. By 6:40, you can peel the skin off the peppers and slice up the mushrooms. And look! Your short ribs are done cooking and staying nice and warm in the slow cooker—perfect timing. Reduce the sauce, shred the rib meat, and toss them together in a bowl. Then start stuffing the peppers and securing with toothpicks. You may have an early-bird guest or two arriving right about now—also great timing. Recruit them to help you by plating the sun-dried tomatoes, mushrooms, and anchovies as you stuff the peppers and add them to your serving dish. When the plates have been arranged, drizzle the peppers and mushrooms with the balsamic glaze, sprinkle with the capers and salt, and serve. Oh, we forgot to mention, you’ve got time to get dressed and fix your hair while the peppers roast and the mushrooms marinate. Just don’t forget to don an apron when you come back — d o y o u k n o w h o w h a r d i t i s t o g e t b a l s a m i c g l a z e o u t o f c o t t o n ? braised beef short ribs SERVES 8 PREP TIME: 10 minutes COOK TIME: 8 hours TOTAL TIME: 8 hours 10 minutes 3 teaspoons salt 2 teaspoons black pepper 3 pounds beef short ribs, trimmed 4 to 6 tablespoons cooking fat 1 onion, quartered 6 cloves garlic, peeled 4 sprigs fresh thyme 2 cups apple cider MIX 2 teaspoons of the salt and all the pepper in a small bowl and use to season the short ribs evenly on both sides. IN an oven-safe heavy pot or Dutch oven, melt 4 tablespoons of the cooking fat over medium-high heat. When the fat is hot, sear the short ribs until each side is golden brown, about 1 minute on each side. (You’ll likely have to do this in batches, adding another tablespoon of cooking fat to each new batch.) TRANSFER all the ribs to a slow cooker. Add the onion, garlic, thyme, apple cider, and 8 cups of water and cook on low for 8 hours. When done, the short ribs should be fork-tender. TRANSFER the short ribs to a bowl and shred, discarding the bones and excess fat. Ladle the cooking liquid, onion, and garlic into a food processor or blender, removing the thyme stems, and blend on low until thoroughly mixed. Transfer the blended sauce to a medium saucepot and bring to a simmer over medium heat. Cook until thickened, about 5 minutes. Season the sauce with the remaining 1 teaspoon salt. TRANSFER the shredded short ribs to a serving bowl, toss with the sauce, and reserve. (You’ll be using all of it to stuff the peppers for your tapas plate.) short rib–stuffed peppers, sundried tomatoes, portabella mushrooms, and anchovies SERVES 8 PREP TIME: 20 minutes COOK TIME: 50 to 60 minutes TOTAL TIME: 1 hour 20 minutes, plus cooking the short ribs 4 portabella mushroom caps, stems removed ½ cup Balsamic Vinaigrette 1 cup balsamic vinegar 8 bell peppers (red, yellow, or orange) ¼ cup extra-virgin olive oil Braised Beef Short Ribs 2 cups sun-dried tomatoes in oil 2 cups Kalamata or black olives, pitted 4 ounces anchovies in oil, drained 2 tablespoons capers, drained 1 teaspoon coarse salt PREHEAT the oven to 450°F. Line a baking sheet with parchment paper. IN a shallow dish or plastic re-sealable bag, marinate the mushroom caps in the prepared balsamic vinaigrette for 30 minutes at room temperature. WHILE the mushrooms are marinating, prepare the balsamic glaze: bring the balsamic vinegar to a boil in a small saucepan over medium-high heat. Turn the heat down to medium low and simmer until reduced by about half, about 20 to 30 minutes. Remove from the heat, allow to cool, and reserve. It should be thick enough to stick to your spoon, but still easy to drizzle. (You can do this step up to a week ahead of time; store in a covered container at room temperature.) IN a large mixing bowl, coat the bell peppers with the olive oil, and place on the prepared baking sheet. Roast in the oven for 30 to 40 minutes, turning once during cooking, until the skins are wrinkled and charred. Transfer the peppers to a bowl and cover with aluminum foil. Allow the peppers to cool for 30 minutes. WHILE the peppers are cooling, reduce the oven heat to 350°F. Remove the mushroom caps from the marinade and discard the vinaigrette. Using the same lined baking sheet, roast the mushrooms in the oven for 10 minutes, then flip them over and roast for another 10 minutes, until the center is soft. Let cool, then slice into strips. RUB the charred skin off the peppers, leaving just the roasted flesh. Remove the stems and seeds, and cut each pepper into four equal quarters. Fill each pepper quarter with a spoonful of short ribs, wrap the pepper around the meat, and secure with a toothpick. ARRANGE the stuffed peppers, roasted mushroom strips, sundried tomatoes, olives, and anchovies on one or more serving dishes. Drizzle a very thin stream of the balsamic glaze over the stuffed peppers and mushrooms. Sprinkle with the capers and coarse salt and serve warm or cold. FANCYPANTS MEALS family lamb dinner MENU Bone-in Leg of Lamb Cauliflower-Broccoli Mash Roasted Beet Salad with Grapefruit-Thyme Vinaigrette DINNER DOESN’T GET more traditional than a hunk of meat, a vegetable mash, and a side salad—but we’ ve put some twists into these dishes to keep them tasty and Whole30- compliant. There’s no way your family members will leave the table hungry after this hearty meal, and even the most skeptical will be forced to admit that this “crazy diet” you ’re on is actually full of familiar, nourishing, delicious foods. Most of this meal can (and should) be done ahead of time, leaving you to navigate your leg of lamb gracefully while still having the time and mental capacity to engage with your guests. Here’s our proposed timeline: Buy the leg of lamb no more than two days before your dinner and make sure you specify a bone-in leg. The extra flavor is worth the hassle of carving around the bone, and you’ll have material for the perfect bone broth when you’re done. The night before your dinner (or the morning of), prepare the cauliflower mash and store in the fridge. This is the time to roast your beets, too. They can take up to an hour in the oven and peeling them can be a messy process, so you want this out of the way before your guests arrive. Plus, the salad is served cold, so you could actually do this step a full day before the dinner. Finally, prepare the vinaigrette and store in the refrigerator. Your lamb needs to soak for about 8 hours, so prepare the marinade either the night before or the morning of your dinner and place in the fridge to marinate first thing in the morning. (An hour of marinating time either way won’t matter much.) Ideally, someone will be around to baste the lamb around the halfway mark. Begin roasting a 6-pound leg of lamb 2 hours before dinner time; back that time up by 30 minutes or so if you have a larger leg. While it’s cooking, you don’t really have much to do—just set a timer for the 30-minute mark to remind yourself to reduce the oven temperature, and then again after another 90 minutes to do your first meat-thermometer check. Ten minutes before the lamb is done, transfer the mash to a saucepan and begin to reheat on medium low, stirring once in a while. At the same time, take the vinaigrette out of the refrigerator. (This will allow some of the olive oil’s cloudiness to dissipate.) Once the lamb is out of the oven and resting, assemble the beet salad in a large serving bowl or individual side bowls. When the lamb is fully rested, it’s time to carve! Carve the lamb by first cutting thin slices parallel to the bone, until you hit the bone. Transfer those slices to a serving platter, then rest the leg on the flat surface you just created, and start cutting thin slices from the thick end of the leg, perpendicular to the bone. Continue until you hit the bone itself. Transfer those slices to the platter, continue cutting thin slices across the meat and above the bone until you reach the end. This gives you “flaps” of meat on top of the bone, which you can then carefully slice off. Slicing “against the grain” in this manner gives you more tender, flavorful meat. Take any meat left on the bone and either clean it off for sandwiches or save it to toss into a Frittata, or take the whole thing and make lamb bone broth following our beef broth recipe. Serve the lamb slices with a side of the warm mash and the beet salad dressed with the vinaigrette. bone-in leg of lamb SERVES 4 (WITH LEFTOVERS) PREP TIME: 15 minutes MARINATE TIME: 8 hours COOK TIME: 2 to 2 ½ hours TOTAL TIME: 2 ¼ to 2 ¾ hours, plus marinating ½ cup extra-virgin olive oil Grated zest and juice of 1 lemon 1 tablespoon fresh rosemary 1 tablespoon fresh thyme 1 teaspoon salt ½ teaspoon black pepper 1 bone-in leg of lamb (6 to 8 pounds) COMBINE the olive oil, lemon zest and juice, rosemary, thyme, salt, and pepper in a large nonreactive mixing bowl and whisk until blended. Pat the lamb dry with a paper towel, place in the bowl with the marinade, and turn to coat all of the meat. Cover with aluminum foil and refrigerate for 8 hours, turning the lamb and basting after 4 hours. (If you don’t have a turkey baster, just use a large spoon to pour the marinade over the lamb a few times.) PREHEAT the oven to 400°F. Place the marinated lamb in a large roasting pan and roast uncovered for 30 minutes. Reduce the oven temperature to 325°F and continue roasting for 90 minutes to 2 hours, until the internal temperature is 135°F (for medium rare) or 140°F (for medium). Cooking times will vary depending on the size of your lamb and your oven, so begin checking the temperature with a meat thermometer at the 90-minute mark, and continue to check every 10 minutes thereafter. REMOVE the lamb from the oven and allow it to rest for 10 m i n u t e s b e fo r e c a r v i n g a s d e s c r i b e d i n t h e m e n u i n t r o d u c t i o n. cauliflower-broccoli mash SERVES 4 PREP TIME: 20 minutes COOK TIME: 15 minutes TOTAL TIME: 35 minutes 1½ cups chicken or vegetable broth 1 head cauliflower, cut into florets 2 bunches broccoli, cut into florets 3 cloves garlic, minced 1 cup coconut milk 2 tablespoons clarified butter or ghee 1 teaspoon salt ¼ teaspoon black pepper 1 tablespoon minced fresh parsley BRING the broth to a simmer in a saucepan over medium-high heat. Add the cauliflower, broccoli, garlic, and coconut milk. Cover and cook until the florets are fork tender, 12 to 15 minutes. TRANSFER the half of the florets and liquid to a food processor. (The florets are so bulky you need to puree in batches, so just estimate half the contents—it will all come back together in the end.) Blend on low speed until smooth in consistency and transfer to a bowl. Puree the remaining florets and liquid. RETURN all the mash to the food processor and add the clarified butter, salt, and pepper, and pulse until well mixed. Add the parsley and continue blending on low until completely smooth. YOU can make the mash up to a day before your dinner and reheat in a saucepan on the stove just before serving. roasted beets with grapefruitthyme vinaigrette SERVES 4 PREP TIME: 10 minutes COOK TIME: 50 minutes TOTAL TIME: 1 hour 4 medium beets ¾ cup plus 2 tablespoons extra-virgin olive oil ¼ cup grapefruit juice 2 cloves garlic, minced 2 teaspoons mustard powder 2 teaspoons fresh thyme 1 teaspoon salt ½ teaspoon black pepper 1 package (about 5 ounces) arugula ¼ cup slivered or sliced almonds PREHEAT the oven to 425°F. RINSE the beets thoroughly and carefully stab all sides with a fork. Place in a medium bowl and add 2 tablespoons of the olive oil, tossing or mixing to thoroughly coat. Wrap each of the oiled beets separately in aluminum foil, pinching the tops closed. Place the beets in the center of a baking sheet and roast for 40 minutes. Check the beets by carefully opening the foil and sticking a thin knife into the center of a beet. If it goes in easily, the beets are done. If there’s resistance, close it back up and put the beets back into the oven for 5 minutes. Repeat until they’re done. WHILE the beets are roasting, prepare the vinaigrette. Whisk the grapefruit juice, garlic, and mustard powder together in a small mixing bowl. Add the remaining ¾ cup of olive oil in a steady stream while whisking to emulsify. Add the thyme and season with the salt and pepper. LET the beets cool until you’re able to handle them. Remove the skin from each beet—you may want to wear gloves, as beet juice will stain skin. Dice the beets into 1-inch pieces and place in a glass storage container with a lid. Refrigerate for at least 30 minutes to chill before serving. PLACE the arugula in a serving bowl, add the beets and slivered almonds, and dress with the vinaigrette